Pro Tip: Want a Head Start? You can build standard grids with the free version, but WP Team Manager Pro unlocks Smart Image Cropping, Popup Modals, and League Management instantly. Start Your 7-Day Free Trial – No Charge Today ->14 Days Money Back Guarantee!
Introduction Once you have installed the plugin, the next step is building your roster. This guide shows you how to create detailed team profiles, assign them to departments, and manage their order on the front end.
Step 1: Create a New Profile
- Go to your WordPress Dashboard.
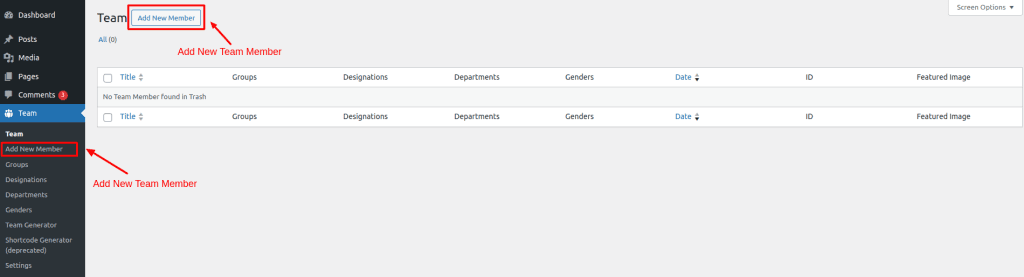
- Click Team Manager > Add Member in the left sidebar.
- Enter Name: Type the team member’s full name in the main Title box at the top.
Add New Member: There are two options to add a new team member. You can either click the “Add New Member” button at the top or select “Add New Member” from the submenu under “Team.”
Step 2: Add Member Information (The Meta Box)
Scroll down to the “Team Member Info” section. Here you can input the specific details that will appear in the Grid or Popup view.
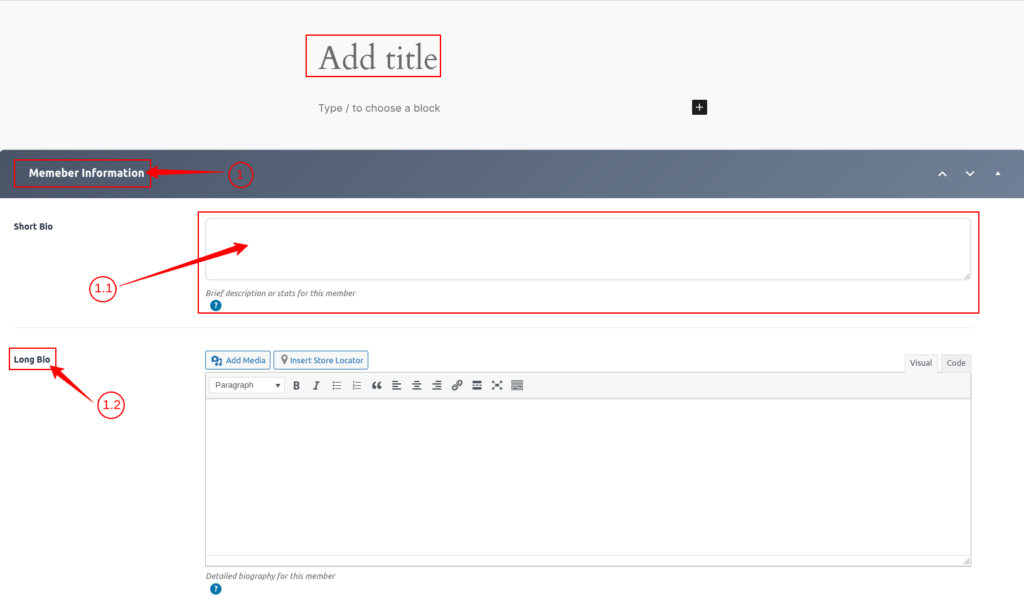
Add Title: First Enter Member Name.
1) Member Information
1.1) Short Bio: Enter a Short Description of the member it will show on the list view page.
1.2) Long Bio: Add the Long bio of the member it will show on a Single page.
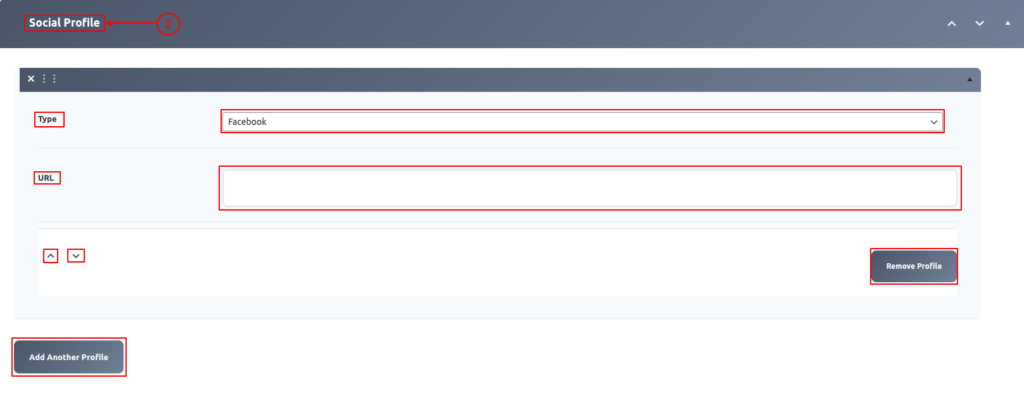
2) Social Profile
Select Icon: Select your social icon.
Url: Add your url social link.
Remove Profile: Remove your profile.
Add Another Profile: Add your Another Profile.
3)Member Image Gallery
Gallery: Add additional images for the member gallery it will show on a single page.
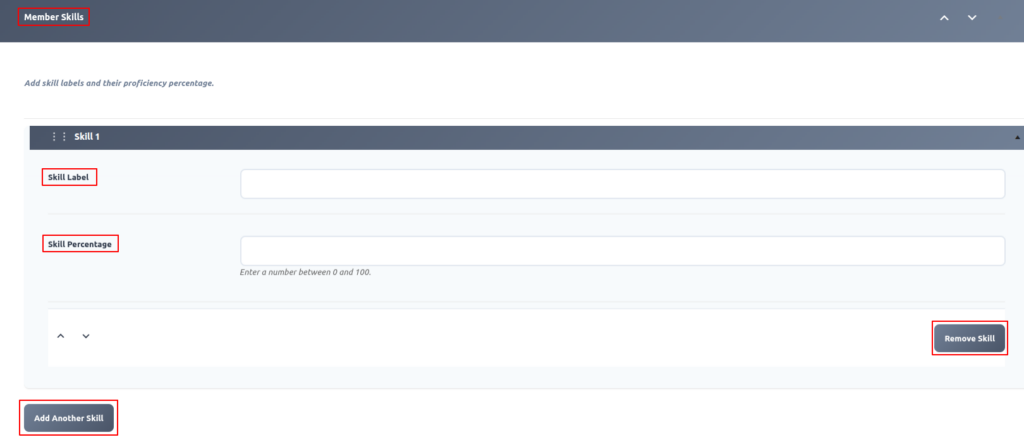
4) Member Skill
Skill : Add multiple skill tags with progress bars or rating indicators..
Add Title and Member Information
- Add Title: First Enter Member Name.
Add Member Information (The Meta Box)
Scroll down to the “Team Member Info” section. Here you can input the specific details that will appear in the Grid or Popup view.
Field Name Description / Instructions
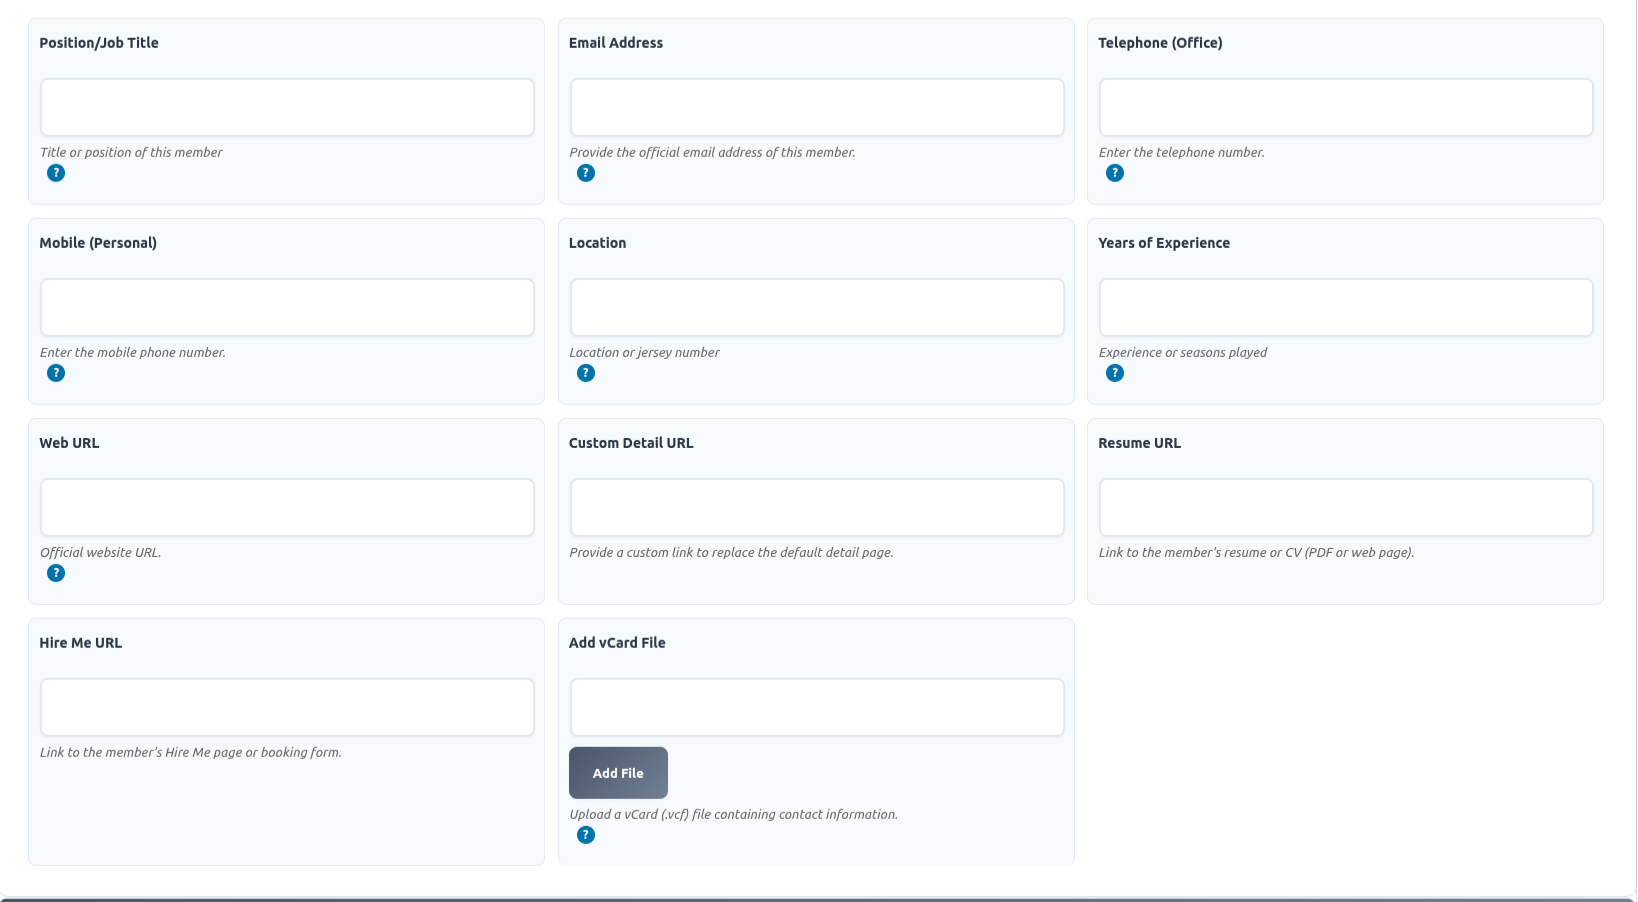
- Position/Job Title
Enter the official title or position held by this member. - Email Address
Provide the official email address for the member. - Telephone (Office)
Enter the member’s office or business telephone number. - Mobile (Personal)
Enter the personal mobile phone number for the member. - Location
Specify the physical location or assigned jersey number. - Years of Experience
Enter the total experience or number of seasons played.
Web & External Links
- Web URL
The official website URL associated with the member. - Custom Detail URL
Provide a custom link if you wish to replace the default detail page for this member. - Resume URL
A direct link to the member’s resume or CV, typically a PDF or a personal web page. - Hire Me URL
A link to a specific “Hire Me” page or an integrated booking form.
Digital Contact Files
- Add vCard File
Use the “Add File” button to upload a vCard (.vcf) file containing the member’s contact information for easy downloading by others.
Social Media Links
Click the “Social Profiles” tab inside the member info box.
- We support over 20+ networks including LinkedIn, Twitter (X), Instagram, and GitHub.
- Simply paste the full URL (e.g.,
https://linkedin.com/in/username). - The icons will automatically appear on the frontend card.
3)Member Image Gallery
Gallery: Add additional images for the member gallery it will show on a single page.

Pro Tip: Want to display a “Skills Progress Bar” (e.g., Coding: 90%)? This visual feature is available in the Pro Version and is perfect for showcasing expertise.