Pro Tip: Want a Head Start? You can build standard grids with the free version, but WP Team Manager Pro unlocks Smart Image Cropping, Popup Modals, and League Management instantly. Start Your 7-Day Free Trial – No Charge Today ->14 Days Money Back Guarantee!
Introduction Stop fighting with columns and image sizes. WP Team Manager integrates seamlessly with Elementor, adding a dedicated “Team” widget to your sidebar. You can drag, drop, and style your entire staff directory using the Elementor interface you already know.
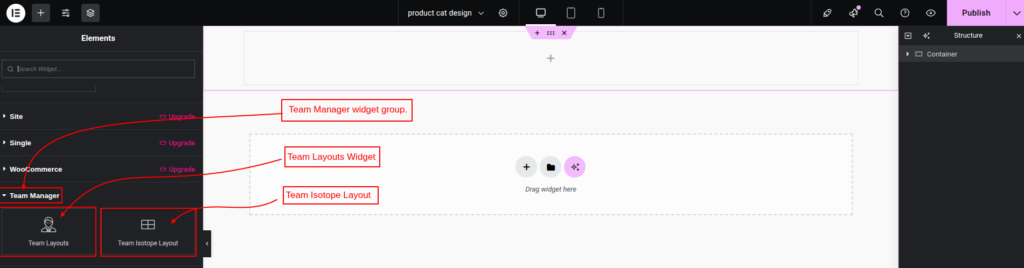
How to Use the Widget
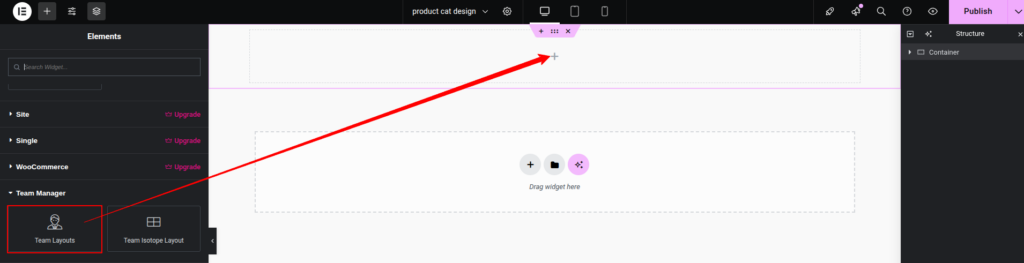
- Open any page in the Elementor Editor.
- Search for “WP Team” in the left-hand widget panel.
- Drag the “Team Layouts” widget onto your page.
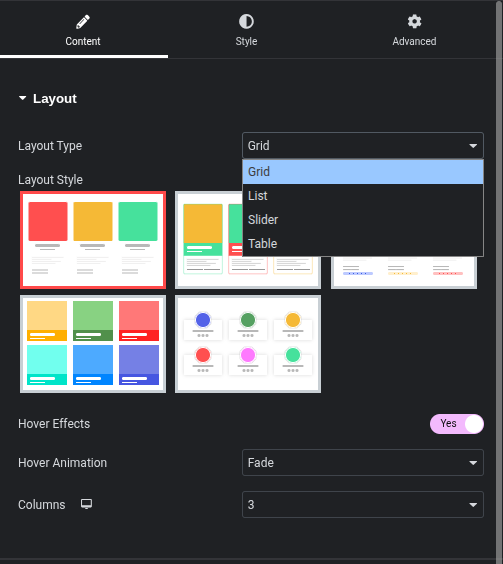
- In the Content tab, select your preferred layout style.
Available Layouts
Your single widget controls 5 different display modes. Click a layout below to see specific settings for each:
- Grid Layout: The classic responsive grid. Perfect for “About Us” pages.
- Slider/Carousel: Great for saving space or showing a large roster in a footer.
- List View: A horizontal layout ideal for displaying bios and contact info side-by-side.
- Table View: A directory style for large organizations.
- Isotope Filter (Pro): The ultimate “Live Filter” grid. Allow visitors to sort your team by department (e.g., Marketing, Sales) instantly without reloading the page.
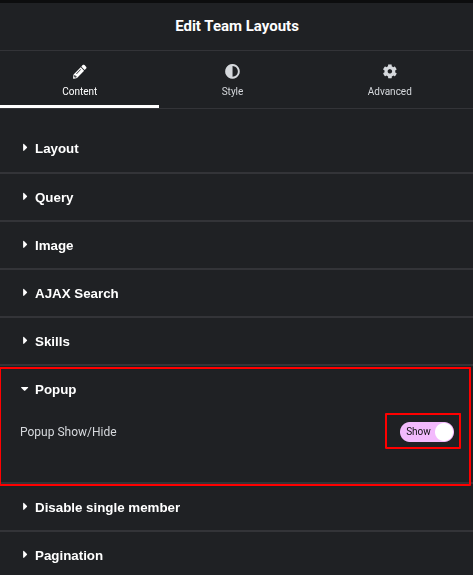
Pro Feature: The “Popup” Modal
One of the biggest limitations of standard Elementor widgets is the lack of a “Read More” modal. With WP Team Manager Pro, you can set the “Link Type” to Popup.
- Result: When a user clicks a team member’s photo, a beautiful lightbox opens with their full bio, social links, and skills—keeping the user on your page.
- Read the Popup Guide ->
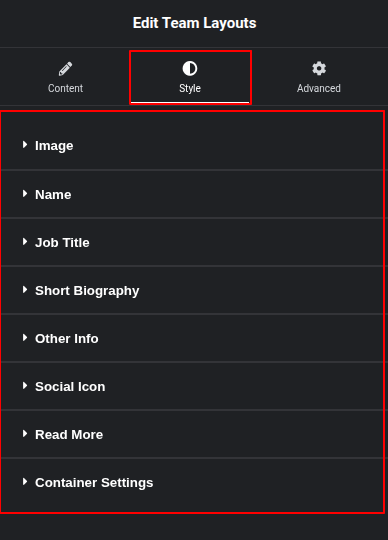
Customization Settings
Once the widget is on your page, use the Style Tab to match your brand:
- Image Shapes: Toggle between Square, Rounded, or Circle with one click.
- Colors: Change the overlay color, text color, and social icon colors.
- Typography: Full control over Name, Job Title, and Bio fonts.
- Social Icons: Choose from 3 distinct styles (Circle, Square, Plain).