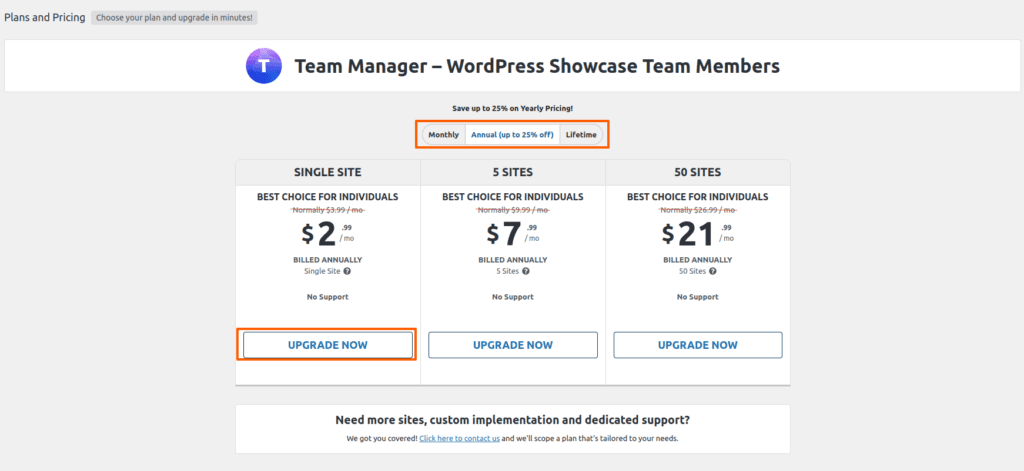
After installing WordPress team manager plugin, you will see an option called Upgrade in our plugin dashboard. After clicking on it, you will see a page to purchase the pro version.

Now you can select the plan of your choice from this menu. You can select the 7-day trial version if you want. Moreover, you can take any of the monthly, lifetime and annual plans of the pro version as per your wish.
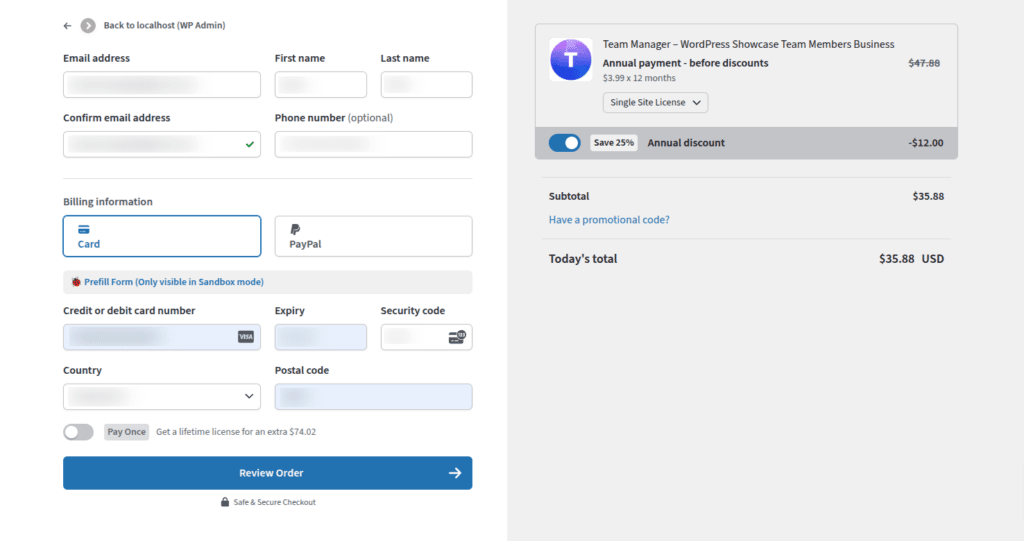
After clicking upgrade, you will be taken to the billing page. Once the process is complete, you will be get an email.
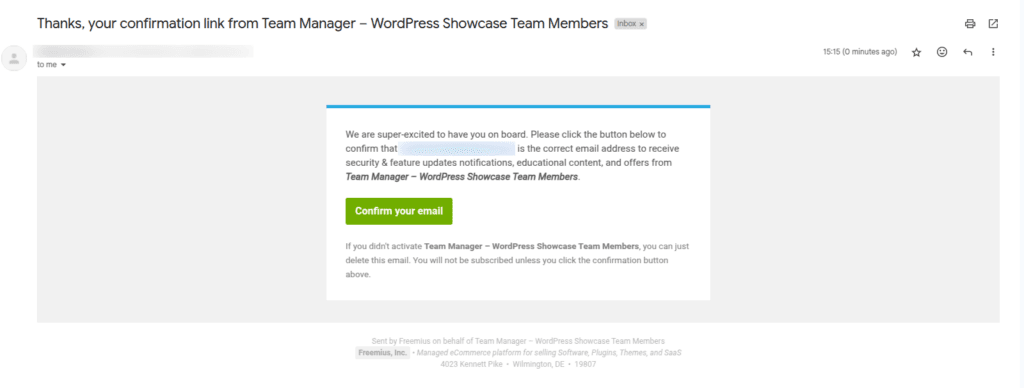
Once you go to your email, you will receive a confirmation email.
After confirming your email, you will see an account name in the menu on our plugin dashboard. Your free version will automatically be upgraded to the pro version and you will get your account details, product license here.
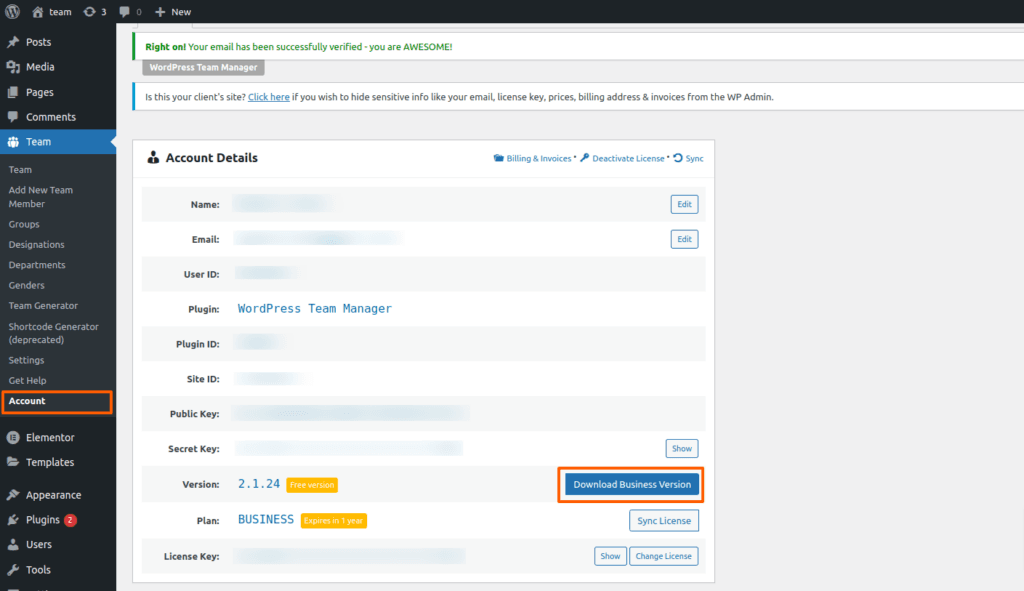
Then click on Download Business Version.After downloading, you’ll find the files in a zip folder on your computer. You need to install the zip folder. Once you’ve downloaded the zip file, follow these steps to install the Team Manager Plugin Pro version.
- Go to your WordPress Dashboard.
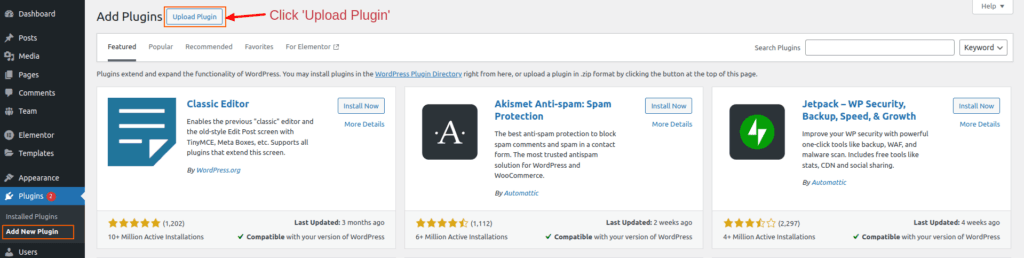
- Navigate to Plugins > Add New.
- In the top right corner, next to “Add Plugins,” click on “Upload Plugin.”
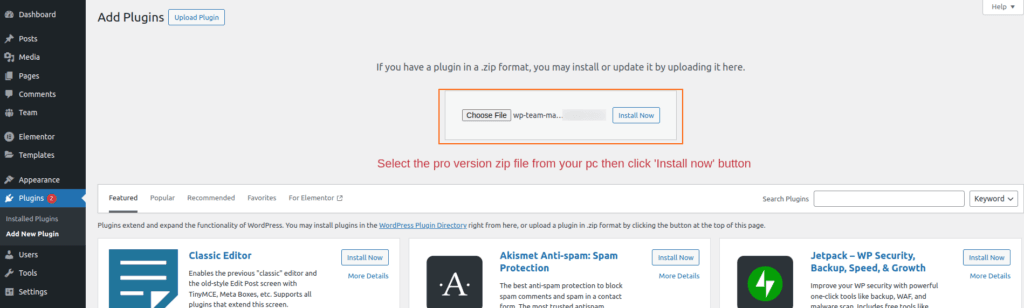
After clicking the “Upload Plugin” button, you’ll see the option to upload a plugin from your computer. Select the “team-pro.zip” file and click “Install Now.”
Once the Pro version is installed and activated, the plugin will appear on your website as shown in the window below.